In the previous article, we walked through the process of creating a web server so if you missed it or haven't completed that setup yet, check it out here: How To Create A Server-Side GTM Container For Use With Google Analytics 4
The next step is to set up a Custom Domain that you'll be using for your web server, so as to match the primary domain of the website. If you've followed the previous guide and set up the tagging server via Google Cloud Platform, the process of setting up a Custom Domain is extremely simple (no web development required) and also free, so let's get straight into it!
Note: If you're running an eCommerce store on Magento 2, make sure you check out the How To Add Google Analytics 4 (GA4) To Magento 2? article, which goes over a step-by-step process of adding Google Analytics 4 tracking to your store! The process can be simplified even further with our powerful Google Analytics 4 (GA4) With GTM Support for Magento 2 extension!
Setting up the Custom Domain using the Google Cloud Platform
As your web server is now provisioned via Google Cloud Platform, you can now access its specific settings and use those to configure the domain names.
-
Head over to the Google Cloud Platform and login if you haven't done so already.
-
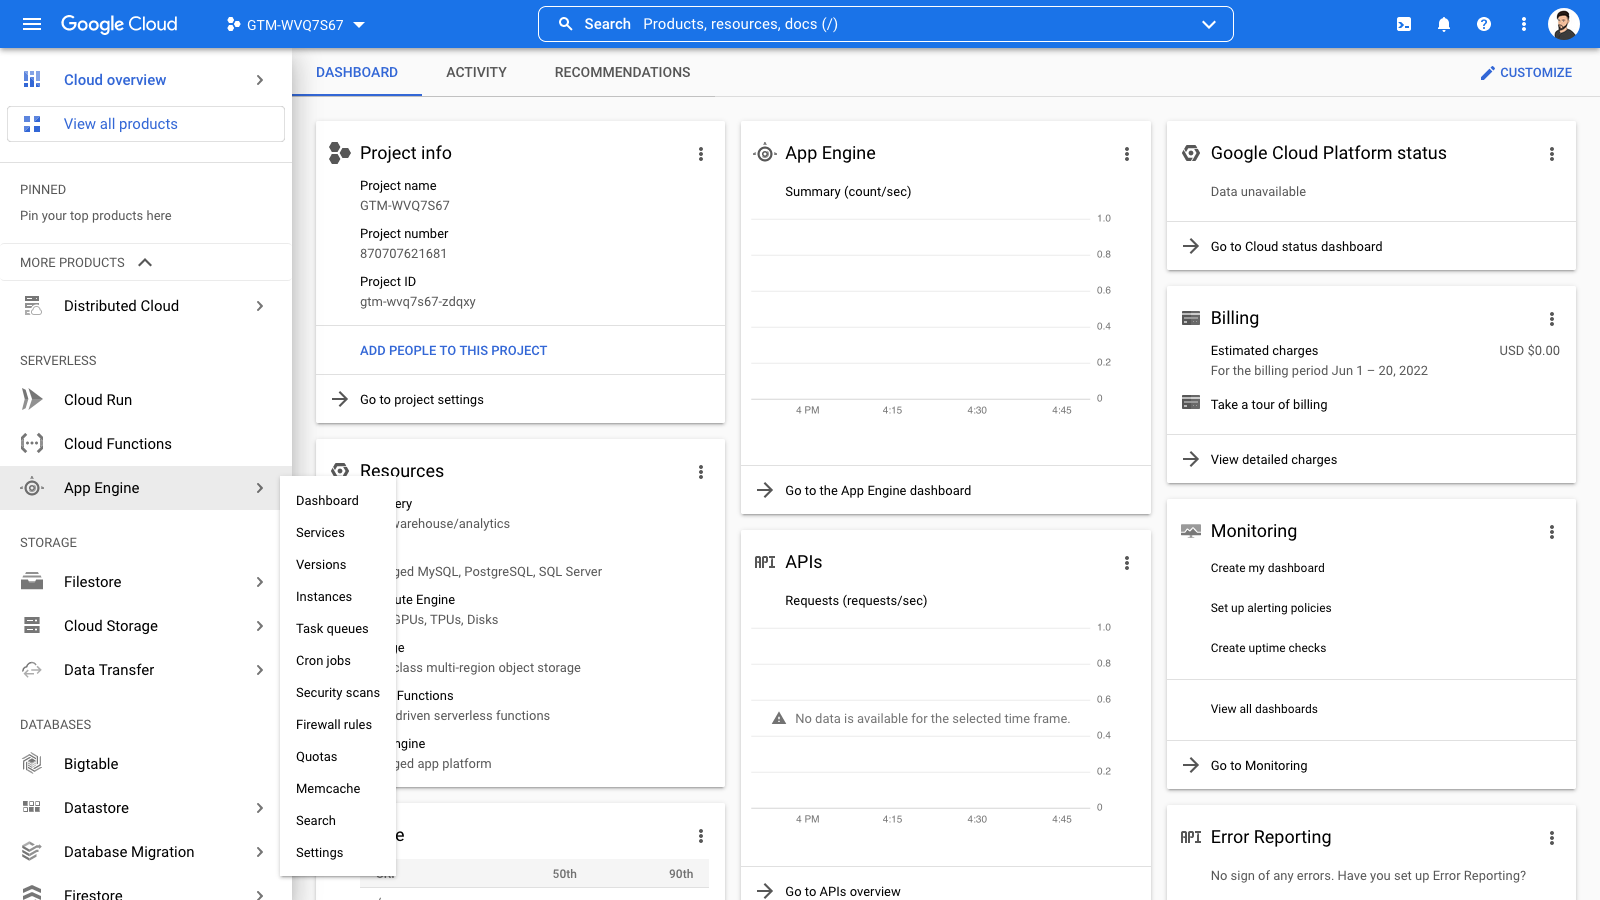
Access your Project Dashboard and use the menu on the left-hand side of the page to scroll down to Serverless -> App Engine and, in the pop-out menu, click Settings.
-
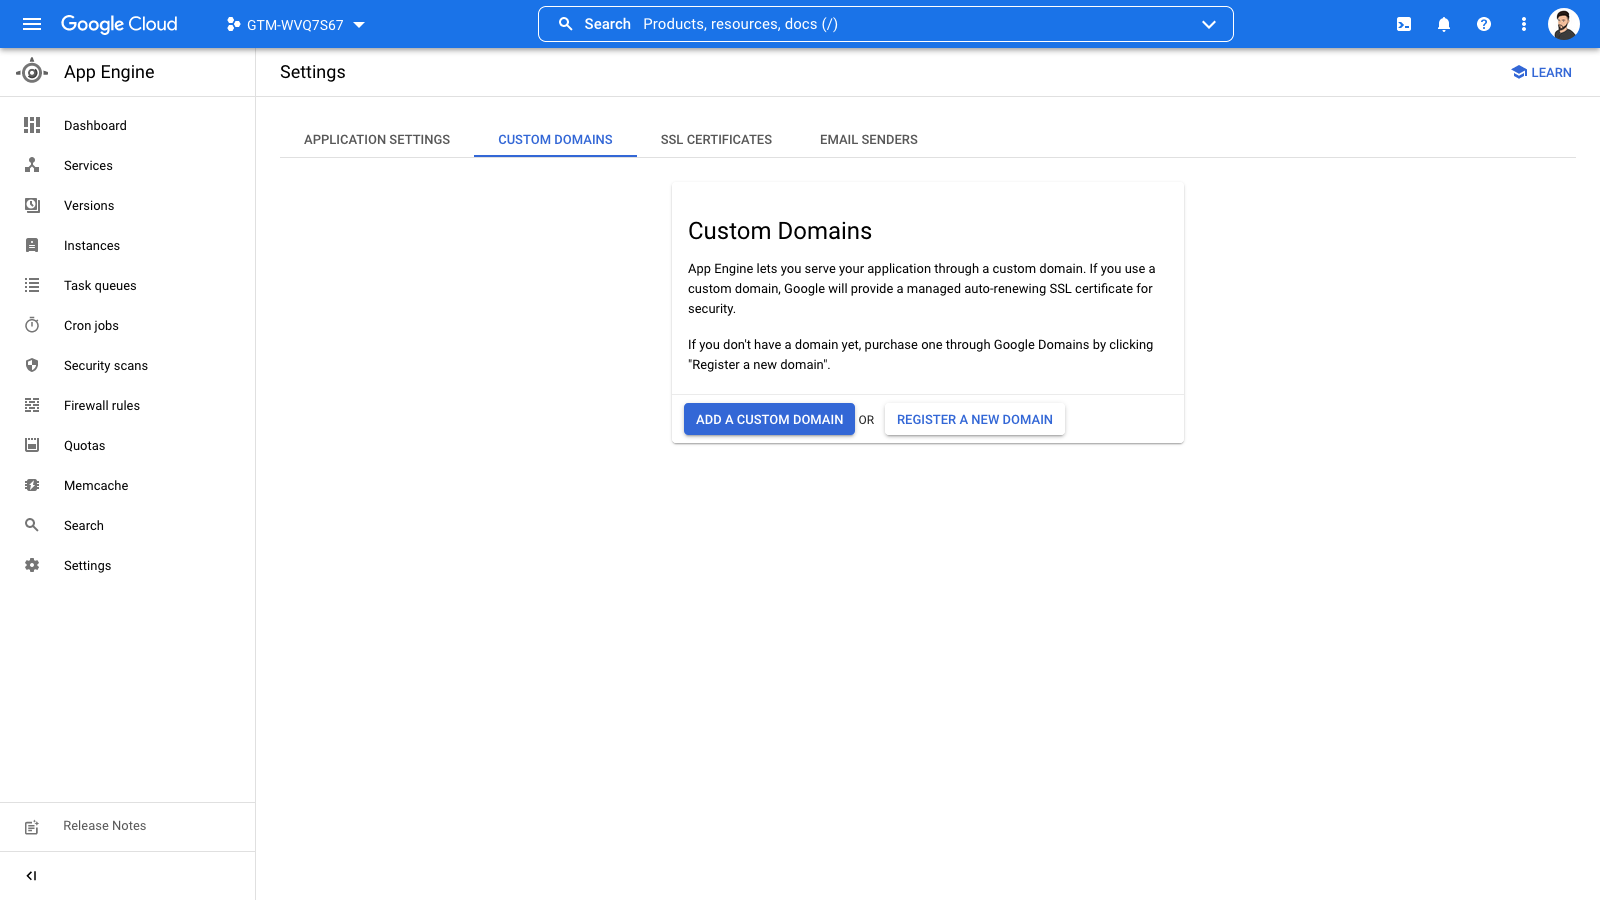
Click on the Custom Domains tab, then click on Add Custom Domain.
-
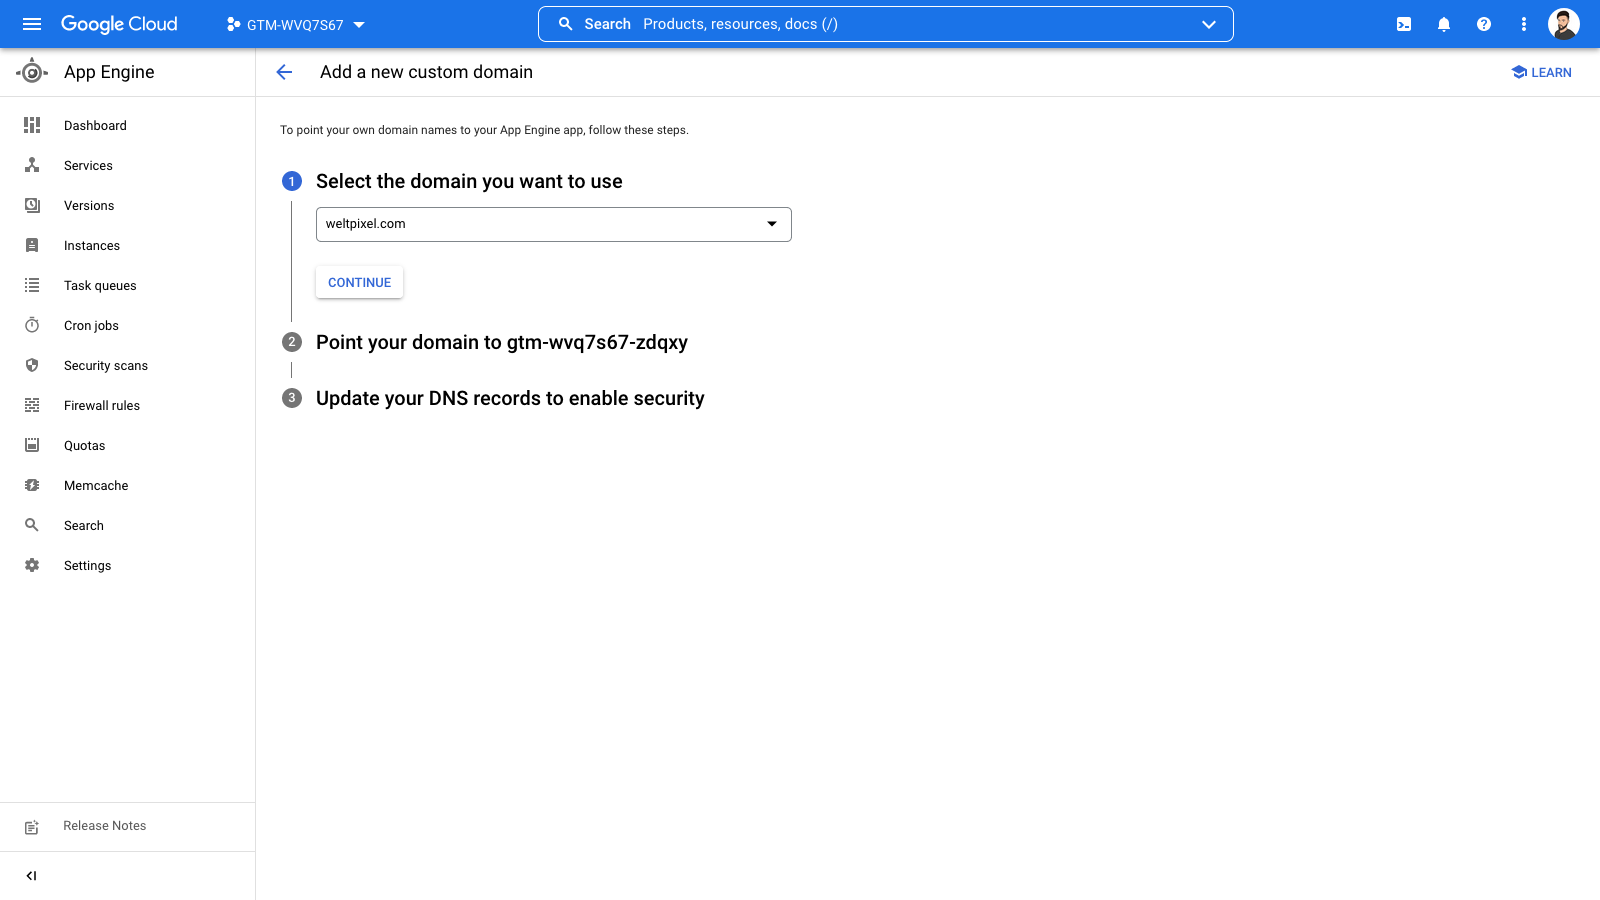
Select your verified domain from the list. If you haven't yet verified a domain with Google, you'll be prompted to do so. You'll need a verified domain to be able to continue, so after selecting it from the list, click Continue.
-
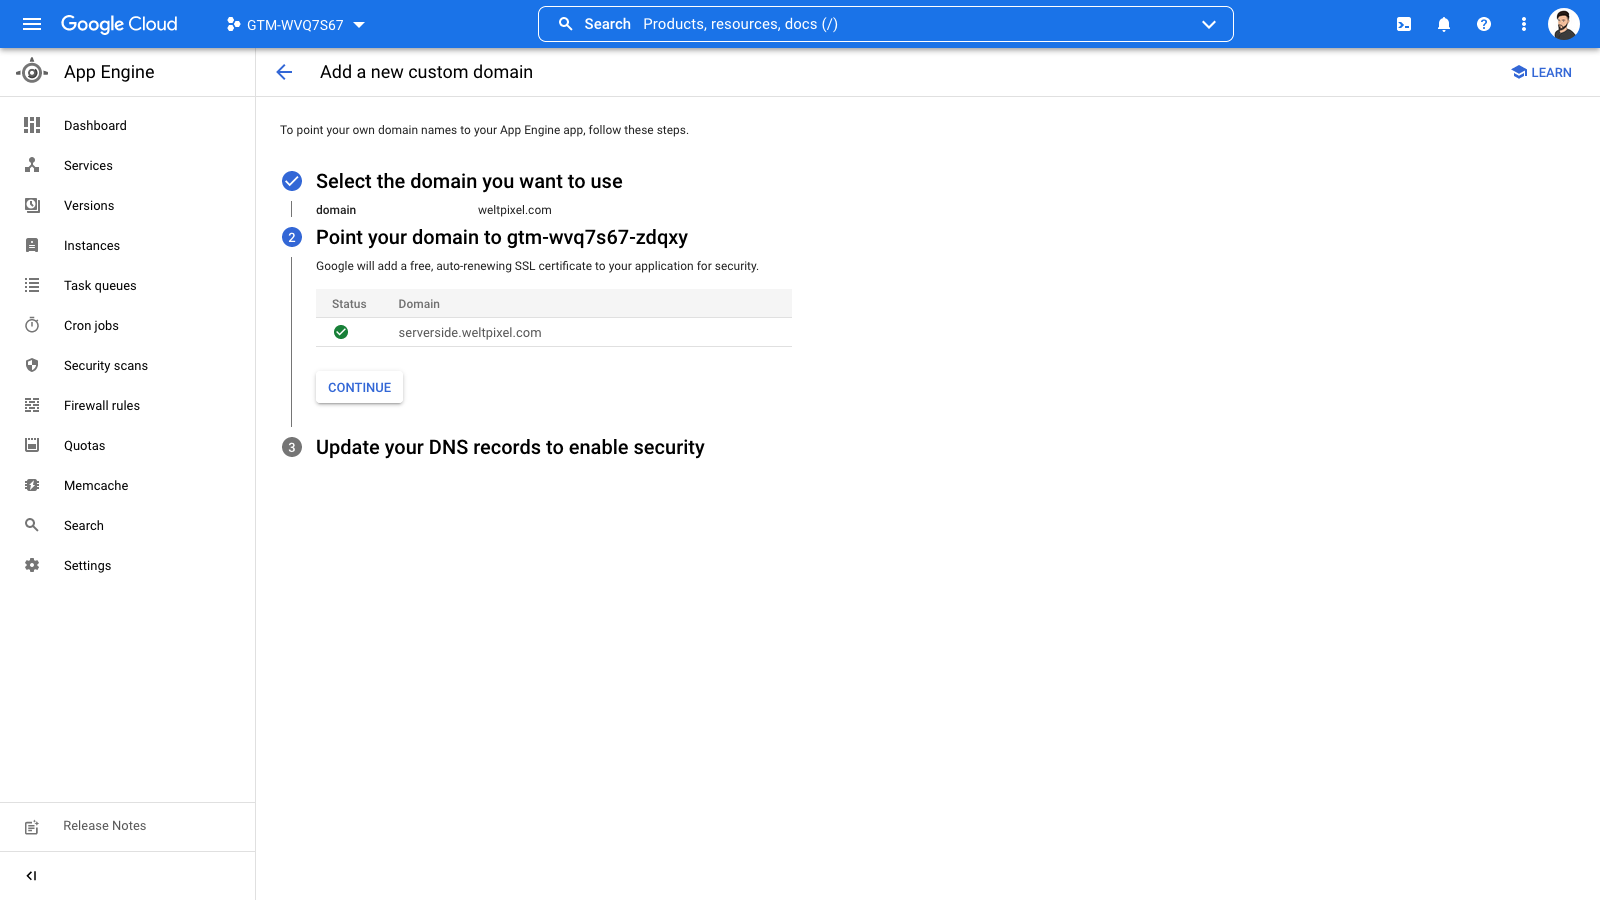
Next, you'll need to add a mapping, or in other words, a subdomain of the main domain you selected in the previous step. It's highly recommended that you add something suggestive and straightforward, such as serverside.domain.com. This, in essence, will be your custom domain. Once you've added it, click Save Mappings and then Continue.
-
The next step involves setting up some DNS records in your domain registrar, for example, GoDaddy or Cloudflare. In some cases, you may only need to set up a CNAME record, but, depending on your setup and the registrar, you may need to add all the records that Google provides via the list. For the purpose of this guide, we'll be continuing with setting up the CNAME record in Cloudflare.
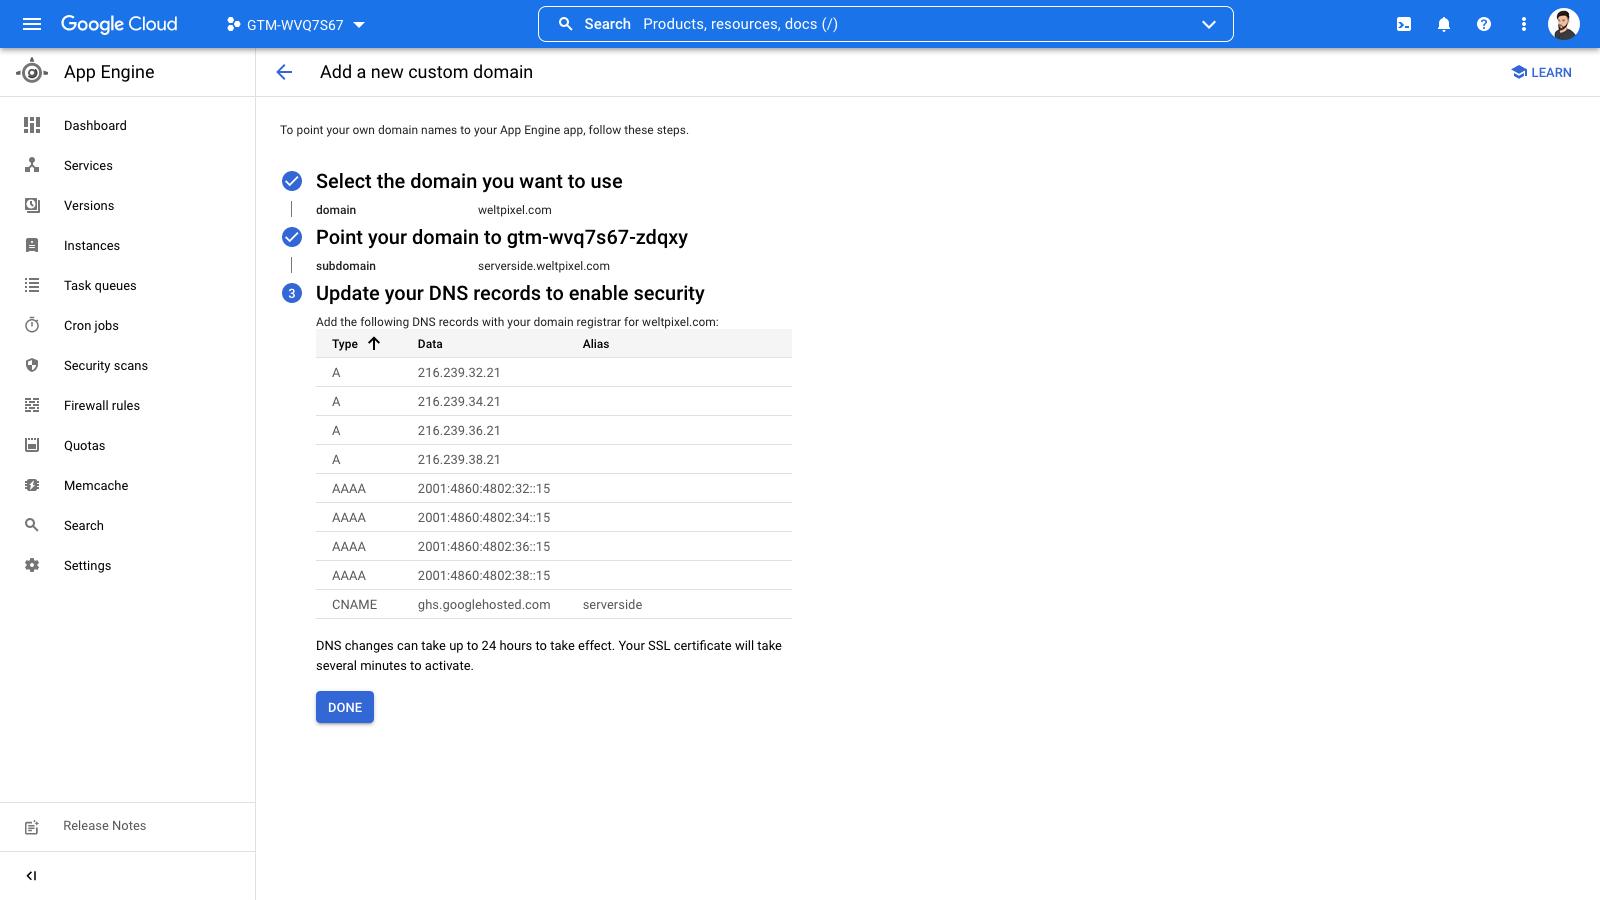
Setting up a CNAME Record (in Cloudflare) for the Custom Domain
This process is similar for most domain registrars, however, for the purpose of this guide, we'll be using Cloudflare. Head into your domain registrar dashboard and log in.
-
Once you've logged in to your domain registrar, head into the DNS servers section and add a new record.
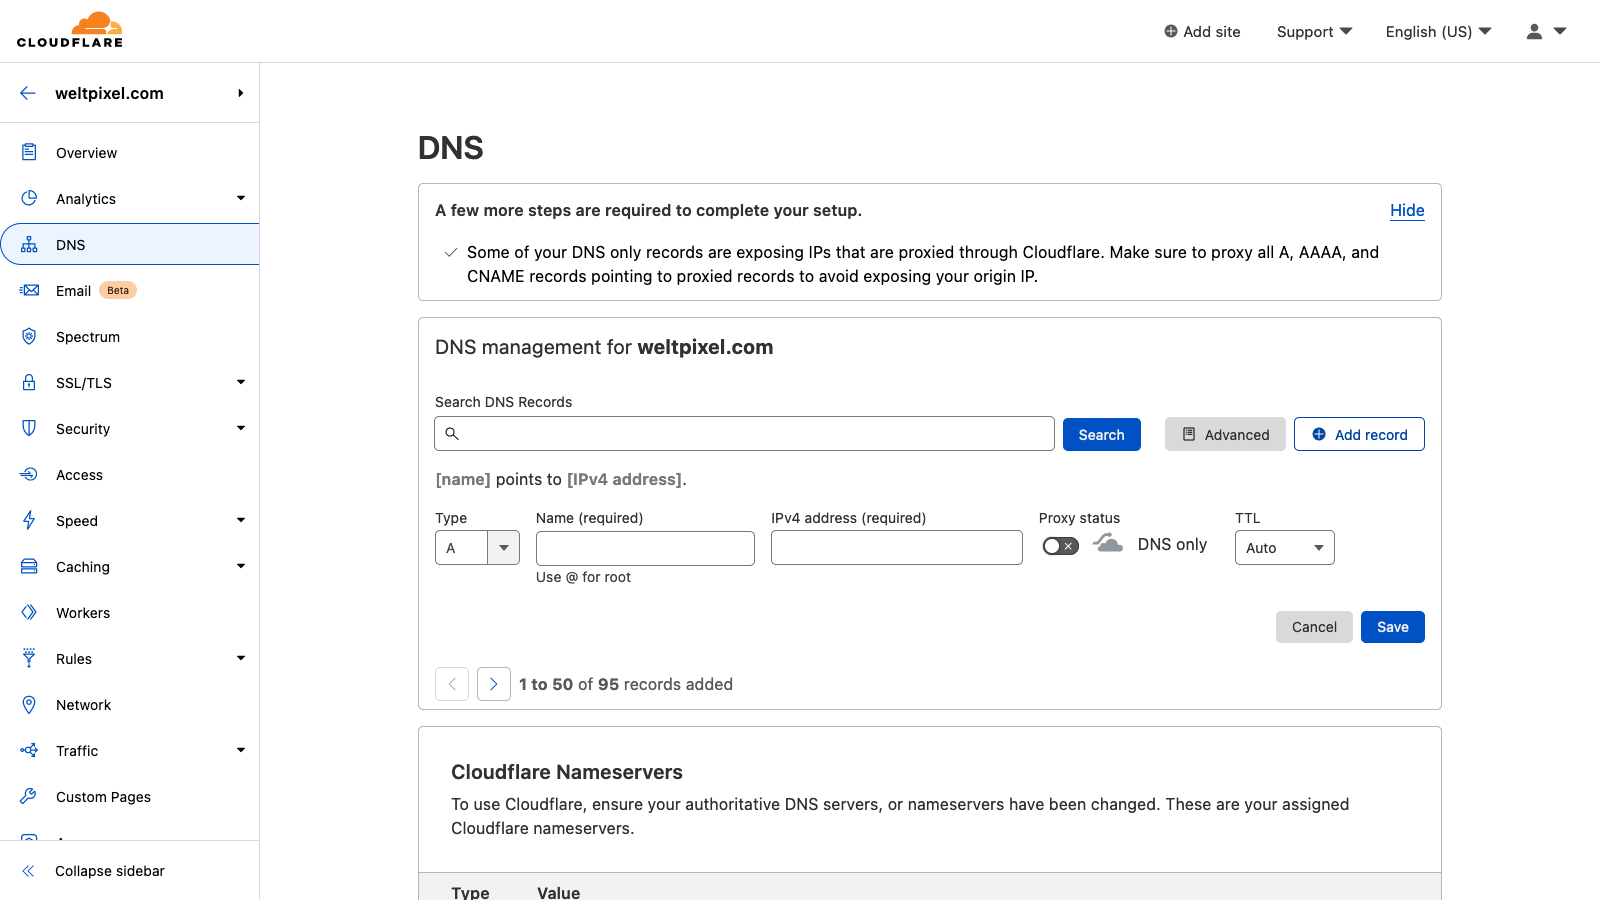
-
Select CNAME under Record Type.
-
Add the subdomain you configured in the Google Cloud Platform under the Name field.
-
Add the link provided by Google under the Target field.
-
Save the record and you should be done!
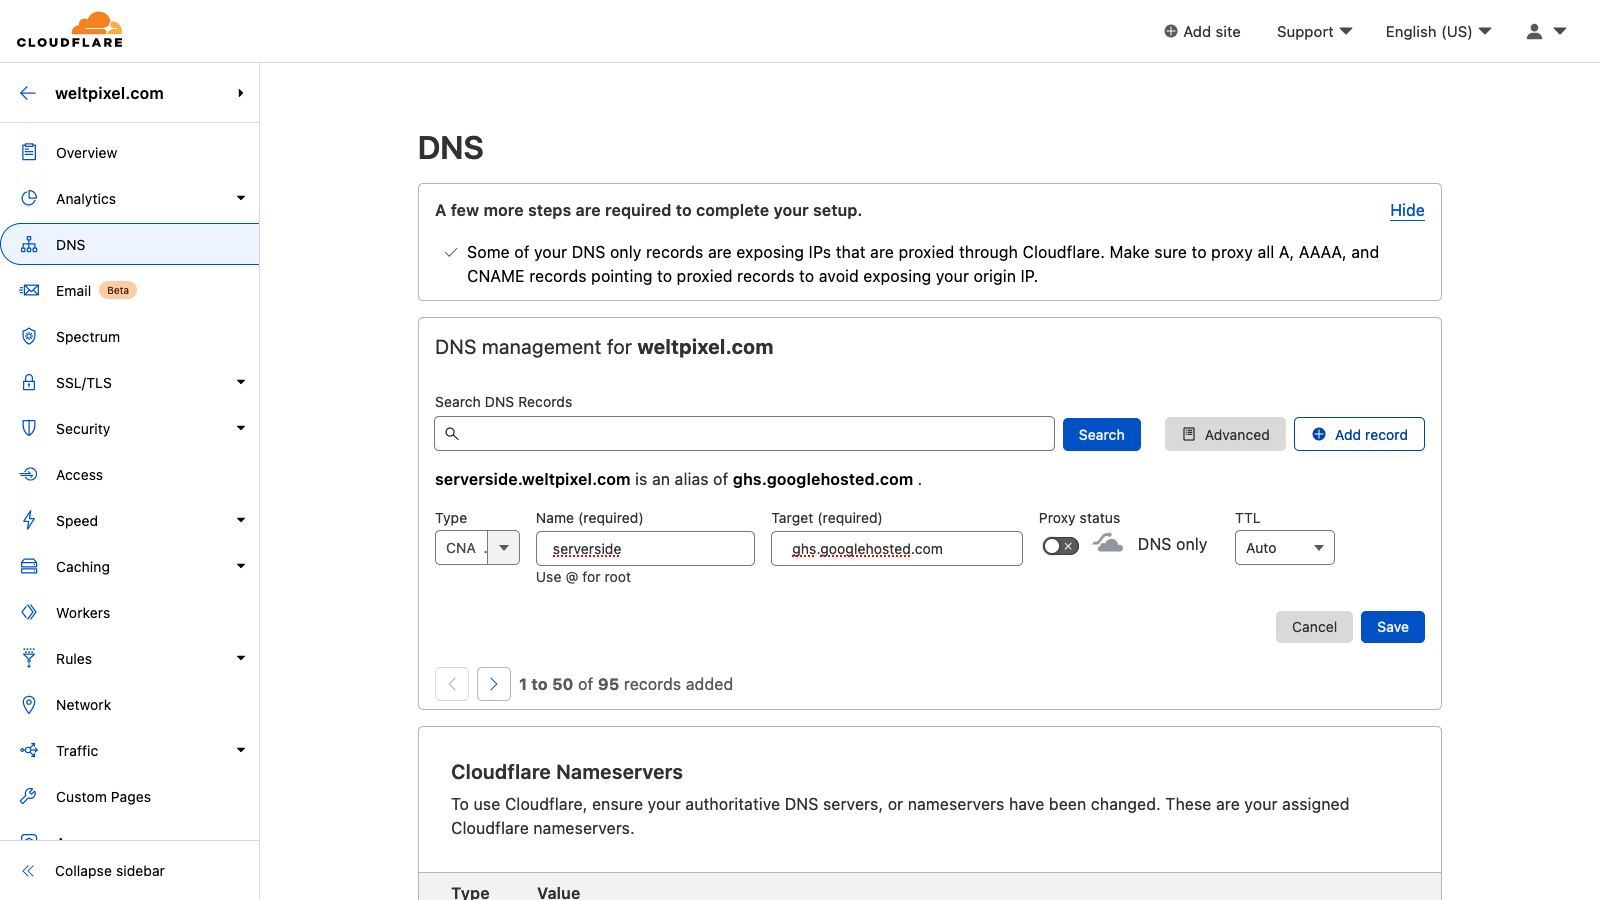
Heading back into Google Cloud Platform to complete the configuration
Once you've saved all the records you need in the DNS/IP Addresses management system, go back into your server's dashboard and click on the Done button.
After clicking the Done button, you'll see the custom domain you added in the list and a spinner under the SSL Security tab. This means that the SSL Certificate for this custom domain is now being generated. This process will take around an hour or so, give or take.
![]()
Once the SSL Certificate generation is complete, all of our requests are going to be sent to this new server, which is now associated with our primary domain, and this server will subsequently pass the data forward to Google Analytics, thus transforming what would normally be a 3rd party cookie (when the requests run client-side) into a 1st party cookie.
This 1st party cookie will allow the tracking to bypass limitations such as Ad-Blockers, 3rd party cookie restrictions, built-in iOS/Safari privacy settings, and other limitations in the user's browser/client device to ensure your tracking is accurate as possible!
The next step is sending the data from the web servers to Google Tag Manager.
Check out all the steps in the guide here:
- Step 1: How to create a server-side GTM container
- Step 2: How to set up a custom domain for your GTM server-side container
- Step 3: How to send data to your GTM Server-Side Container
- Step 4: How to preview and debug the server-side container
- Step 5: How to monitor realtime server-side data in Google Analytics 4
- Step 6: How to move the Google Analytics 4 tagging server from testing mode into production mode